
Simon Miller’s 7 Tips for a Flawless Bob

The bob is nothing new—in fact it’s a true classic. But recently, we’ve seen tons of new approaches for cutting and styling bobs so they’re sweet, chic, cool and up-to-date. If your bob skills could use an upgrade (and really, you can’t practice or study this shape enough), listen up! These seven fabulous tips from Simon Miller, National Technical Trainer for KMS California, will have your bobs in shape in no time.
1. Find the Sweet Spot
When assessing the optimal length, we look at the hairline, the texture, the cowlicks, but we also have to look at the shoulders and the neck. The bob connects the shoulder, the neck and the face, and if it hits the wrong place, it all goes wrong. Finding the “sweet spot” is an amazing way to elongate a neck.
2. Take Down the Shelf
One of the biggest problems when graduating a bob is that ‘shelf’ that forms in the back. To avoid the shelf, it’s critical to study the client’s occipital bone—the size and prominence. Is it round or flat? With graduation, we can create a beautiful occipital if the client doesn’t have one, we can lower the round or raise it. When designing your graduation, be sure to look at the profile. If she has a protruding chin, for example, and the graduation is too low, the face will appear even longer. So you’ll need to work on the diagonal to raise it.
3. Two Ways to Graduate
My two favorite ways to graduate are vertical and horizontal. Vertical graduation creates a strong nape and a softer crown. You get more movement, with a clean, structured perimeter. Horizontal graduation produces a softer nape with a stronger baseline above. Vertical graduation can be worn wavy or straight—there are lots of styling options. If a client has a structured jaw, horizontal graduation will be easier to style.
4. Invisible Layers
It’s a fine line between a layered bob and a shag. If you over-layer a bob it becomes round. I love doing invisible, internal, concave layers on this cut, keeping the sections above the parietal longer and blending them into those interior layers. To do this, create your baseline, section out the crown, then lift sections underneath the crown to 45 degrees and cut a c-shape, short-to-long. Using the shorter part as a guide, cut the crown section in an opposite c-shape, long to short. This way, the top layer sits more heavily on top of the shorter layers, which prevents the overly-round shape.
5. Face Shape
No matter what the face shape, keep in mind that the pieces that hit the face are like arrows—they point directly at the jaw, eye or cheek. That’s where the eye will gravitate. So direct those ‘arrows’ to the features you want to spotlight. If the face is round, too much face framing will exacerbate the roundness, whereas a strong corner with minimal face framing will produce more of an oval effect. Conversely, placing the line along the jaw can make a square face look even blockier.

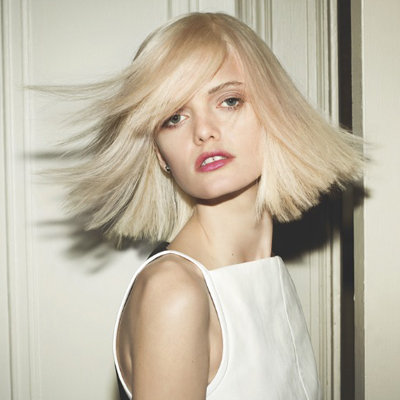
6. Smooth Finish
Textured finishes are trending right now, but I think a woman in a sleek bob stands out. If you’re going for a straight finish, apply KMS California Freeshape Hot Flex Spray to damp hair and wrap-dry rather than relying on a flat iron. Wrap-drying smooths the hair while retaining body and movement, producing more of a ‘textured’ straight finish than stick straight.
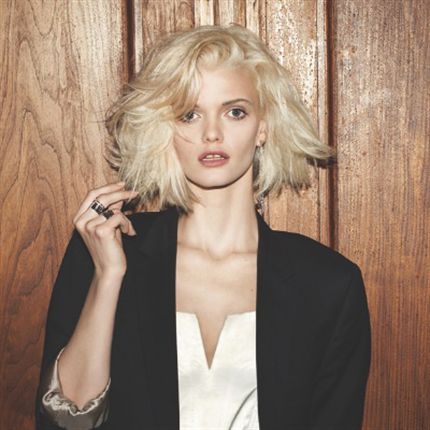
7. Flat Iron Waves
I believe creating waves with a flat iron is the best way to produce a textured finish on a bob. Mist dry hair with KMS California 2-in-1 Styling and Finishing Spray—it will create that modern, bundled wave. Grab vertical sections and ribbon them through the flat iron, kicking up the ends. As you grab sections, let the hair tell you what to do. If her curl is moving forward, then back, follow that movement pattern. When you do this, your clients will feel more like themselves, and the styles will last longer.

