
11 Tips For Hair Tattoos That Slay

By Katie Harrington
The barbering community has always been keen to offer up hair tattoos to their discriminating clients, but this season the mainstream has gotten hold of the concept, and it’s trending like mad. Consumer beauty destinations like POPSUGAR and Allure.com are touting the “sneakiness” of the look—clients who can’t display the patterns 24/7 can conceal them on undercuts beneath longer sections until it’s OK to let them come out to play.
Sam Daly (@bottleblonde76) is one of today’s most sought-after hair tattoo artists, and she warns that if you think it’s harder to do than it looks—you’re right! “When I first saw it done I was like, ‘Oh my God that’s so easy—I’ll just take my edger and go for it,’” laughs Sam. “And it is so not like that. It’s really, really difficult!”
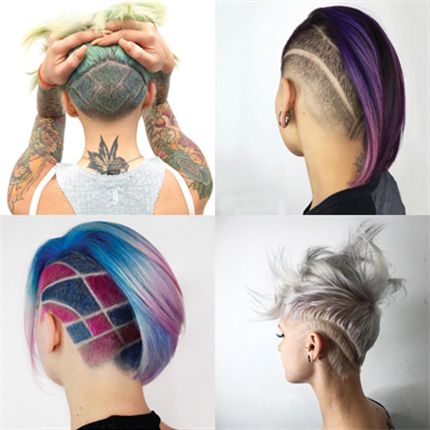
Clients drive hours for Sam Daly’s (@bottleblonde76) colorful, vivid hair tattoos.
So Sam decided to get help. She searched barbers in her area and found Mike Kessler (@mikemadethemfly) and his amazing designs. “I contacted him and offered to pay him to come and teach me, and it turns out he knew who I was!” So Sam and Mike struck a deal. Sam would teach him how to create her classic, vivid colors and Mike would teach Sam everything he knew about undercuts and hair tattoos. “This is the best advice I can offer to someone wanting to learn the craft,” says Sam. “Reach out to a local barber and see if they want to collaborate. Barbering was always my greatest fear, but you can’t let fear stand in your way!”
Ready to give hair tattooing a try? In addition to Sam, we sourced top hair tattoo artists Doug Theoharis (@doug_theo)—the 2015 BTC #ONESHOT winner for Precision Shot of the Year—and Emily Anderson (@emilyandersonstyling) for their tried and true tips.

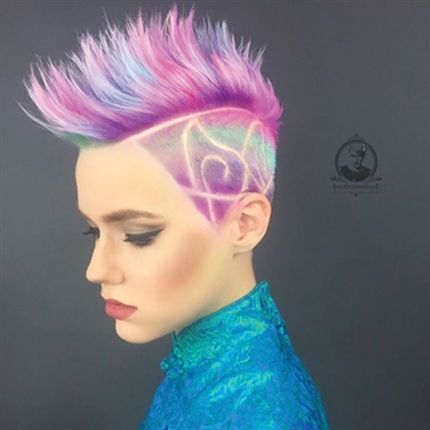
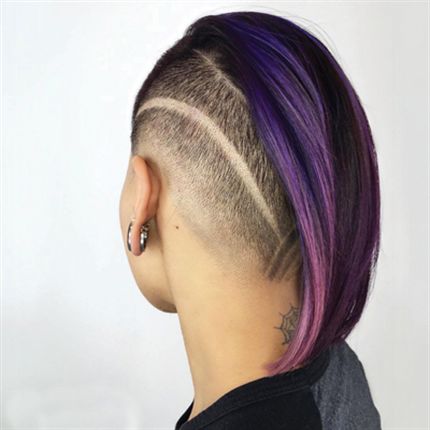
Doug Theoharis’ (@doug_theo) colorful pixie undercut was created using a combination of shears and a straight razor.
1. When starting out, begin with short, straight lines, like crisscrosses and chevrons. As you start to feel more comfortable, longer or curved lines will become less challenging.
2. During your consultation, feel your client’s head shape and amount of hair. “The thickness of a client’s hair is a large determining factor in how far up I take the shaved section,” says Emily. “If they don’t have a lot of hair but really want a shaved design, I will usually create a much smaller shaved section or even discuss doing an asymmetric undercut on one side.”
3. Designs look cleaner when the undercut is faded, but save the fade for last. First take down the length, then cut the lines, then fade. This allows you to customize the fade to accent the design.
#ONESHOT finalist Fern Andong’s (@fernthebarber) edgy clients can’t get enough of his unique looks.
4. To add interest to his undercuts, Doug creates highs and lows of fading throughout the design. “This produces contrast and definition,” he says. The two most common methods Doug uses are:
alternating: “For example,” he says, “if I fade tighter on the left side of a section, I will then fade tighter on the right side of the section right above the previous one.”
“lite shines”: This involves fading in the center of a section (where the light shines off the round of the head) and leaving the outer areas heavier. “This way the design stands out with fading, but the lines are as designed as if they had not been faded,” notes Doug.
5. Work with your client’s head shape and nape hairline when carving a design. Working with the natural hairline produces natural-looking outgrowth.
6. Practice on a mannequin. “None of us love that idea, but it’s important to get comfortable and create muscle memory before jumping in with a client,” notes Doug.
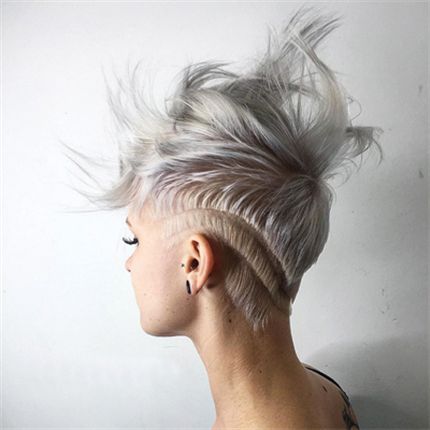
Parlour Eleven Owner Jamie Gomez’s (@bleachedandblown) #ONESHOT-nominated look. Color by Stephany Smith.
7. Hold the skin taut when using a razor, and keep the blade at a 30-degree angle to avoid cutting the client. “I like to massage a serum into the shaved section before using the razor,” says Emily. “It helps prevent razor burn and allows you to see the design you are carving.”
8. When painting colors on her undercut designs, Sam uses angled balayage brushes. “The consistency of the brush is perfect,” she shares.
9. To market yourself, offer your services free to strategic “walking billboards” like tattoo and piercing artists or employees of an edgy clothing store.
10. Be honest with your client. “I was once in the middle of a design when I realized it wasn’t going to turn out like I’d hoped,” says Doug. “If you find yourself in that situation, speak up. In that instance, I switched to a geometric design, and [my client] was incredibly grateful I didn’t continue with something I knew I wasn’t going to do well.”
11. Find the tool you feel most comfortable with–shears, trimmers, a straight razor or a combination. Many stylists start etching with shears or trimmers and go back over the design with a razor to get the cleanest possible lines. “What I love about the straight razor is that the entire blade can be used to remove big portions of hair,” Doug explains. “But it’s also incredibly precise—with extra care, small movements and the corner of the blade, you can remove individual hairs.”
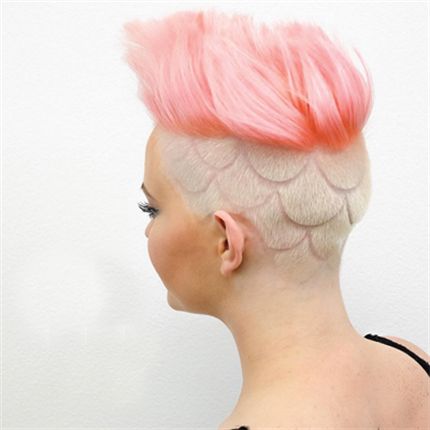
One of Doug’s classic hair tattoos, a nominee for a #ONESHOT precision award.
More from
Sam Daly
-
#thebtcshow 2019
PULP RIOT AT #THEBTCSHOW 2019
-
#THEBTCSHOW 2018
Pulp Riot: Bubble Technique, Gray Coverage Highlights & Peekaboo Designs
-
#thebtcshow Austin 2017
The Behind The Chair Show 2017: Day 2
-
#thebtcshow Austin 2017
Pulp Riot at #thebtcshow
-
Business
8 Tips For Getting The Perfect Shot
-
Business
BTC’s 12 Instagram Tips for Beginners
-
Business
Instagram Tips To Get You Noticed

