
4 Styling How-Tos From The Bio Ionic Style Awards Finalists
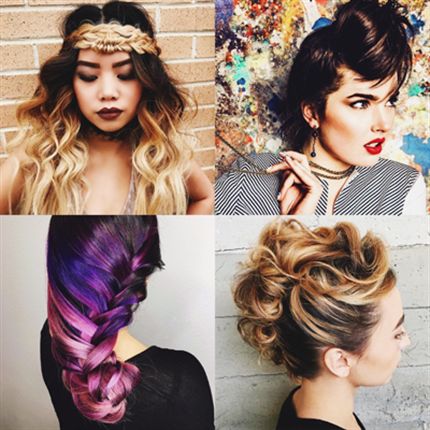

Ready for four totally different styling how-tos that will suit any client? These hairdressers created their looks using Bio Ionic tools and earned themselves spots as finalists in the Bio Ionic Style Awards! That means they’ll head to Hollywood on April 23 for a chance to compete live—and win BIG.
Each finalist will receive a Bio Ionic tool kit and a trip to Hollywood to compete in this year’s Bio Ionic Style Awards to win the grand prize of a once-in-a-lifetime editorial photo shoot and the chance to become a Bio Ionic Brand Ambassador. Get your tickets NOW to see the action live in Hollywood!

Megan Schipani, @shmeggsandbacon
Columbia, M.D.

Megan’s crown is fit for a queen, and her “hoker”—hair choker—takes this look up another level!
1. Starting at the nape, take a 1 to 2-inch section and curl with the Bio Ionic Long Barrel Styling Iron. Alternate the direction of the curl for a more natural look. When you reach the hairline, curl away from the face.
2. Spray with Kenra Professionals Dry Texture Spray and comb through the curls with your hands until you reach the desired level of curl. Finish with Label M Sea Salt Spray.
3. Starting at the crown of the head and moving towards the nape, section out two, 3-inch long vertical sections.
4. Braid section one in a three-strand braid.
5. Braid section two in a three-strand braid for the first half, and then switch to a small infinity braid. You can switch to any kind of braid you want to be your headband accent. Switch back to your three-strand braid to finish out the section.
6. Wrap section one around the front of the head, laying it across the forehead. Pin the braid down.
7. Wrap section two around the forehead so that it lays on top and the accent braid is in the middle of the forehead. Pin the braid down.
8. At the nape, section out a small triangular section to begin the “hoker.” Split it in half.
9. Braid each part of that split section in whatever type of braid you want. Wrap each section around the neck and pin.
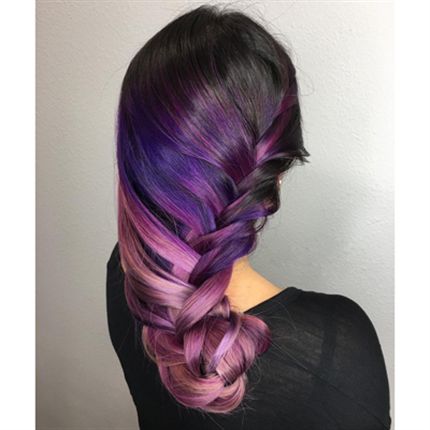
Franco Hernandez, @hairbyfranco
Seal Beach, Calif.

Franco’s gorgeous and colorful balayage fishtail braid makes us think of gemstones.
1. Use a balayage technique with Redken Flash Lift + 30-volume developer + b3 Brazilian Bond Builder.
2. Go back in with Pulp Riot colors in Velvet, Jam, Lilac, and Mercury. Apply in an alternating color melt placement.
3. After processing 20 minutes, rinse the hair thoroughly with water. Shampoo is not necessary.
4. Blow-dry the hair smooth with the Bio Ionic 10X Blow Dryer and Pai Shau Biphasic Infusion Rejuvenating Concentrate.
5. Once smooth, create a medium-tension, over-directed fishtail braid.
6. Braid all the way down to the end of hair and tuck the tail under. Secure with pins.
7. Smooth and spray all flyaways with Pai Shau Sublime Hold Hair Spray to finish, keeping hair soft and romantic.
Jessica Warburton, @hairhunter
Los Angeles

Jessica’s romantic, textured updo is a perfect bridal style.
1. Curl the hair with a Bio Ionic 1-inch Stylewinder for texture and movement. Set the curls and brush them out.
2. Divide the hair into one triangle section for the bangs and three sections to make small ponytails.
3. Make three ponytails down the center of the back of the head.
4. Backcomb the underneath of each ponytail, the roll under and pin to make a loop.
5. Fan the loops out to make little half-circle shapes.
6. Backcomb the bangs section for volume.
7. Gently fan out and mold the curls into “S” shapes and pin into desired place.
8. Spray with firm hold hairspray and smooth down flyaways.
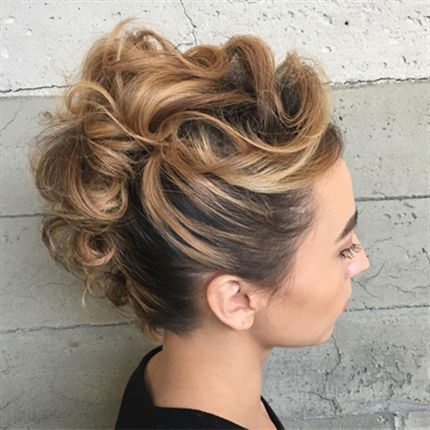
Loni Hale, @lonihalemakeup
Chicago

Loni’s retro-meets-modern updo is looking even more amazing with the cool styling in this shot!
1. Prep dry hair with Joico K- PAK Protective Hairspray. Spray liberally in sections, being sure to concentrate on the ends. Brush thoroughly.
2. Working in 1-inch sections from bottom to top, curl the hair from the scalp to midshafts with the Bio Ionic GoldPro Curling Iron. Leave out midshafts to ends to create volume near the scalp.
3. Repeating the same sectioning, finish the ends with Bio Ionic One Pass flat iron.
4. Vigorously brush hair from scalp to ends. Mist hair lightly, concentrating at scalp through midshafts, with Joico Hair Shake Finishing Texturizer Spray. This product creates traction.
5. Very lightly brush the surface of the hair with the head upside down. Mist the surface very lightly with Style Sexy Hair Play Dirty Dry Wax Spray. Create subtle texture by gently loosening pieces from the smoothed surface.
6. Gather the hair into a ponytail at the front top of the head—slightly off-center is best. You are creating side-swept faux bangs with the remaining hair.
7. Neaten any loose hair and spray with Big Sexy Hair Spray and Play Volumizing Hair Spray. Fold the remaining ponytail under and pin the shape into a flattering position at base of ponytail. The hair should lay slightly onto the front hairline.
8. Detail any piece-y hairs with your choice of wax, paste or hairspray. Mist overall with hairspray for hold.

