
Tearsheet City Chameleon How-Tos

Tearsheet City Chameleon How-Tos
HOW-TO STEPS 
-
 1
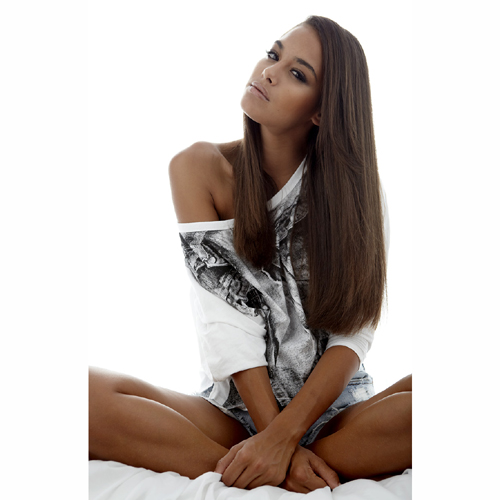
1Sometimes perfect, frizz-free, sleek locks are difficult to achieve, even in the most perfect climate and with the best hair type. Here, Tearsheet’s Sharon Brousseau of Ricks Island Salon and Day Spa, Marco Island, FL shows how to get those perfect, straight locks from her experience at Tearsheet.
Step 1: On dry hair, apply Redken guts 10 volume spray foam and a small amount of water sprayed on the root area on top of the head to crown.
Step 2: Blow dry using nozzle and boar brush to direct the hair.
Step 3: Once dry, continue to brush hair in desired direction
Step 4: Using small 1/4 inch sections, begin at the nape, apply flat iron (2-3 strokes per strand) working through the sides and top of the hair (if highly textured hair, use 1/8 sections).
Step 5: Finish by apply Redken glass 01 smoothing serum for shine and resilience.Photo credit: James Weber
-
 2
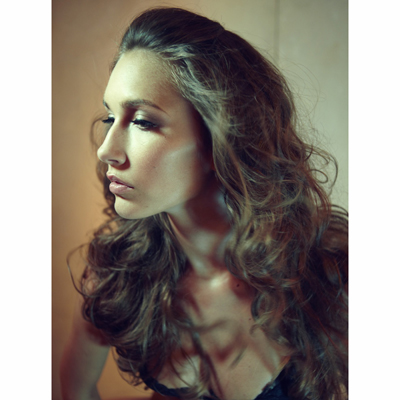
2Cascading waves by candlelight is just the look your client wants when she’s out on the town with her sweet beau. Tearsheet’s Wendy Belanger, Influence Salon, Calgary, Canada gives you a few tricks to make her look picture perfect well past dessert being served.
Step 1: Using a 1 inch curling iron, wrap hair in vertical sections. Spray each piece with a working aerosol spray like Pureology InCharge Flexible Styling Spray and be sure to alternate curls toward and away from the face.
Step 2: Wrap the top in a brick-lay fashion going back. Let cool and take down. Rake out curls with your fingers.
Step 3: Take a section across the fringe area and lightly back brush. Lay back section and fasten with a bobby pin. Lightly rouge the remaining hair with a wide tooth comb. Spray lightly.Photo credit: James Weber
-
 3
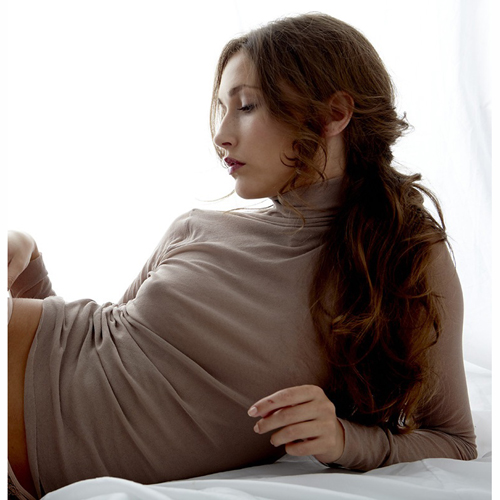
3Need a look to go from day-to-night for your clients? These swept over and pinned waves create a romantic, flirty look that can take her from office to a night out well into the late hours. Created by Tearsheet’s Editorial Styling participant Shara Marquez, Osgood O’Neil Salon, Dallas, TX.
Step 1: Using a 1 ¼ inch barrel iron, curl hair in two inch sections, clipping the curls in place to set.
Step 2: After removing clips, run fingers through the hair to separate the curls and slightly back-comb the crown.
Step 3: After removing a few strands around the face, pull back the hair softly to keep the texture and twist at the nape.
Step 4: Secure with bobby pins on preferred side.Photo credit: James Weber
-
 4
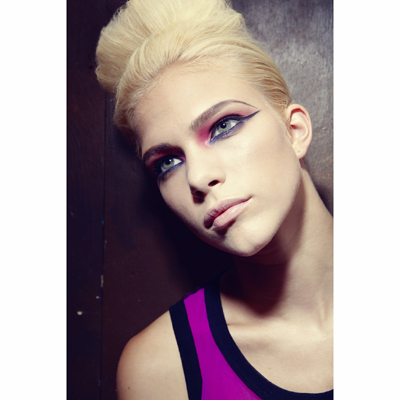
4The week’s over, and your client wants to get glitzed, glammed, and primped for her big night on the town. Tearsheet’s April Webster, First Impressions Salon & Spa, Portage, MI takes a classic – the French twist – and updated it with added texture elements to create a fresh, trendy look bound to turn some heads!
Step 1: Create a “powdery, textured” feel to the hair with Pureology’s Rootlift mousse applied scalp to ends. Using a nozzle, blow dry hair using a Denman or paddle brush directing the hair back.
Step 2: Create a horseshoe section on the top of the head. Clip hair on top away.
Step 3: Start center back, taking one inch vertical sections, and back brush hair scalp to mid shaft. Continue with one inch vertical panels, directing the sections back as you pad the hair, until front hairline is reached. Smooth exterior surface with a soft bristle brush and Pureology InCharge hairspray. Do this for both sides.
Step 4: Twist and lift section toward center part to create a French twist. Secure with bobby pins placed vertically down into twist.
Step 5: Starting at the back of the horseshoe section, back brush in horizontal sections, elevating the hair straight out from the head until front hairline is reached. Smooth exterior with soft bristle brush and hairspray.
Step 6: Roll hair straight back, tucking ends in with the two previous sections using both hairpins and bobby pins. Use tail comb to blend all sections into a seamless-looking beehive twist.
Step 7: Determine where you would like first wave to start. Place metal tail comb horizontally to hold hair. While still holding comb use a warm blow dryer on low to create first wave section by directing airflow onto tail of comb. Repeat on right and left side until a “headband-like” effect is achieved.Photo credit: James Weber
YOU MIGHT LIKE THIS
-
Barbering
Men’s Crop Haircut
-
Hair Color
Undone Twist & Metallic Gold Accents
-
Braids
Braids: Interwoven How-To
-
Hair Color

How-To: Silver Lilac
-
Intl. Looks
Freestyle by Giorgio Lavoratopresented by Estetica
TRENDING NOW!
-
BTC Hair Trend Report
The Biggest Haircut Trends of 2024
-
Copper
What Is The "Cowboy Copper" Hair Trend? Here's What It Really Means...
-
Curly
Long Layers: 10 Pro Tips + Common Cutting Mistakes
-
Blowouts
Bombshell Blowouts: 4 Ways To Create Lift With Longevity
-
Frizz
Straighten & Smooth 2A, Fine-Medium Density Hair
-
Ask A BTC Expert
5 Foil Tips & Tricks From @the.blonde.chronicles
-
Copper
Muted Bronze
-
Haircuts
SHAG 101: The Dos And Don'ts

