
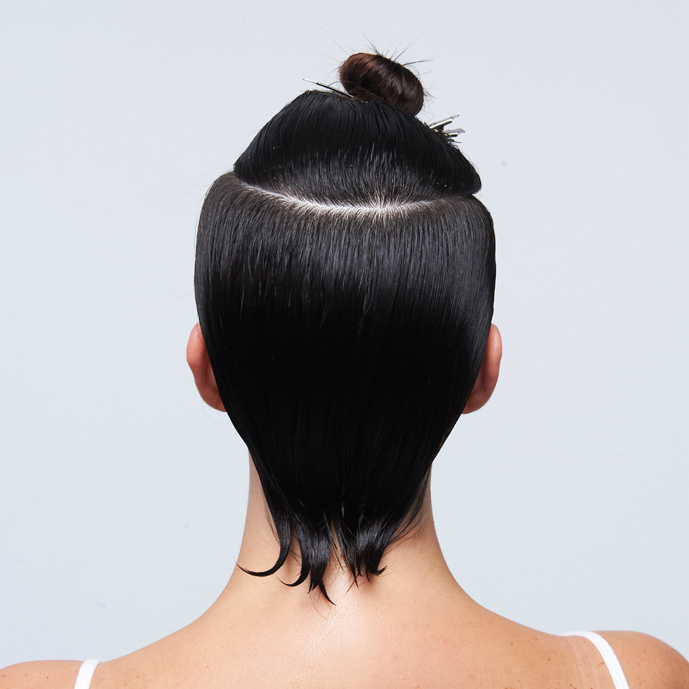
Futuristic, Graduated Cut from Joico’s Damien Carney

Advertisement
Advertisement
Advertisement
Advertisement
Advertisement
Advertisement
Advertisement
Advertisement
Futuristic, Graduated Cut from Joico’s Damien Carney
HOW-TO STEPS 
-
 1
1 -
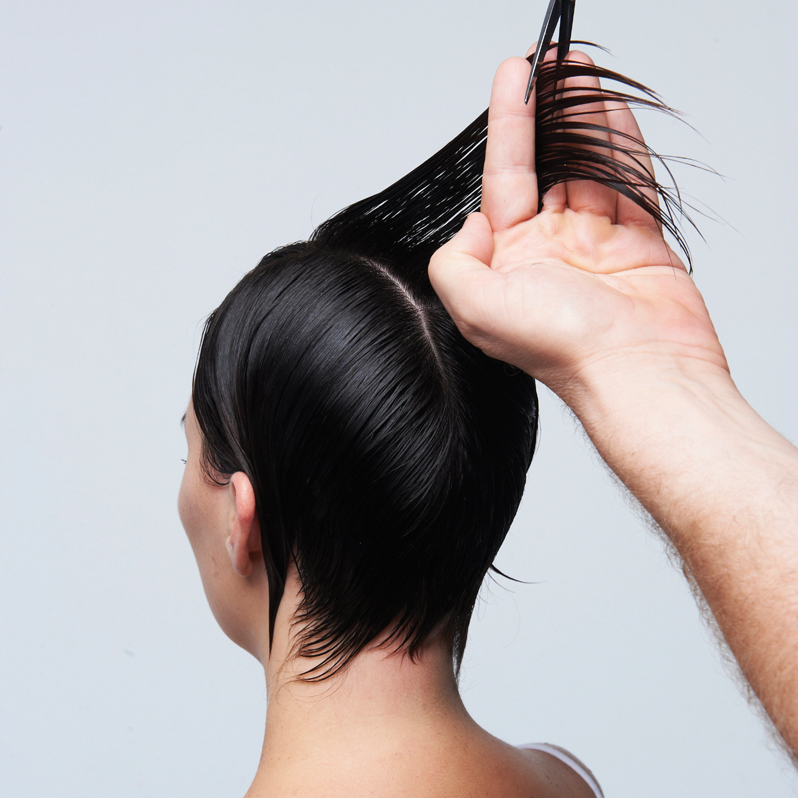
 2
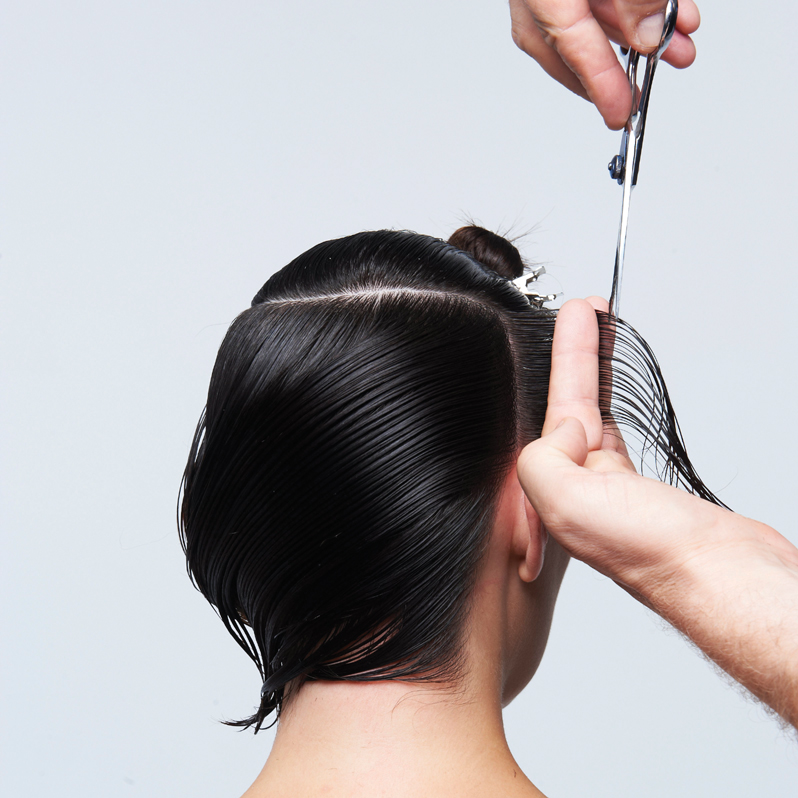
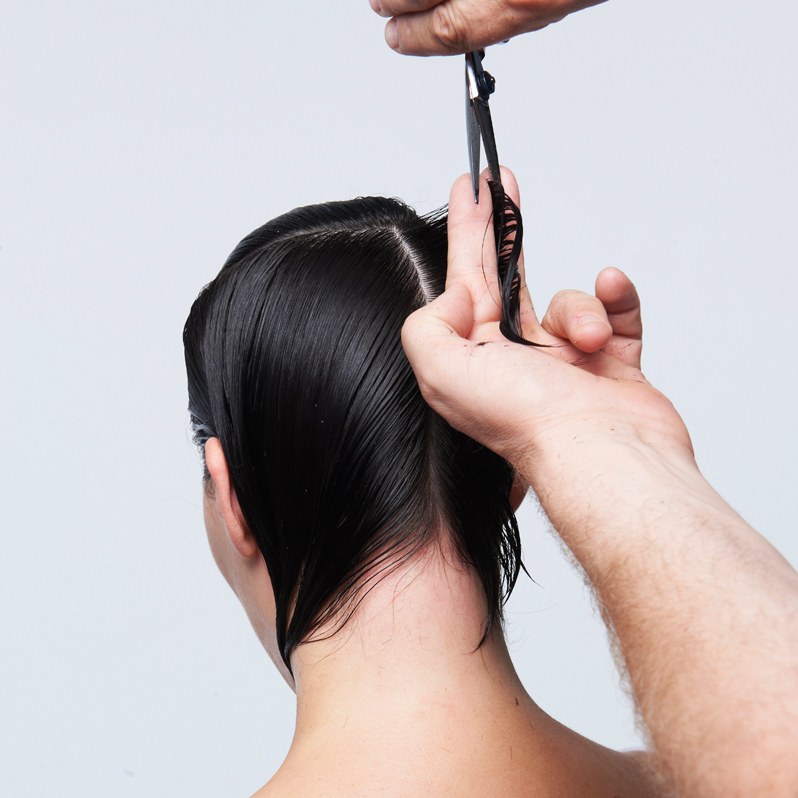
2Section the hair as shown.
-
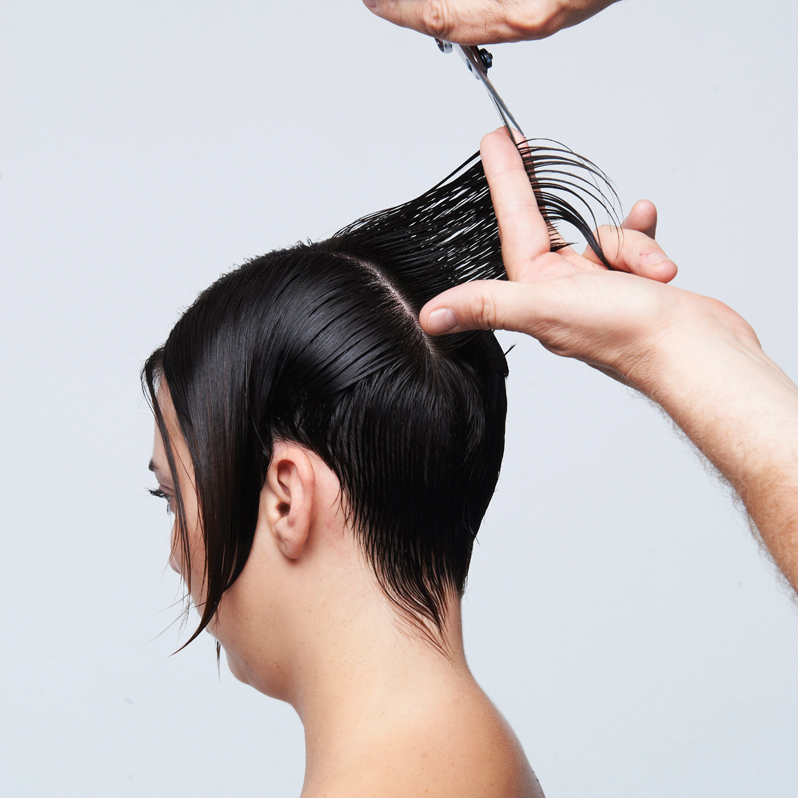
 3
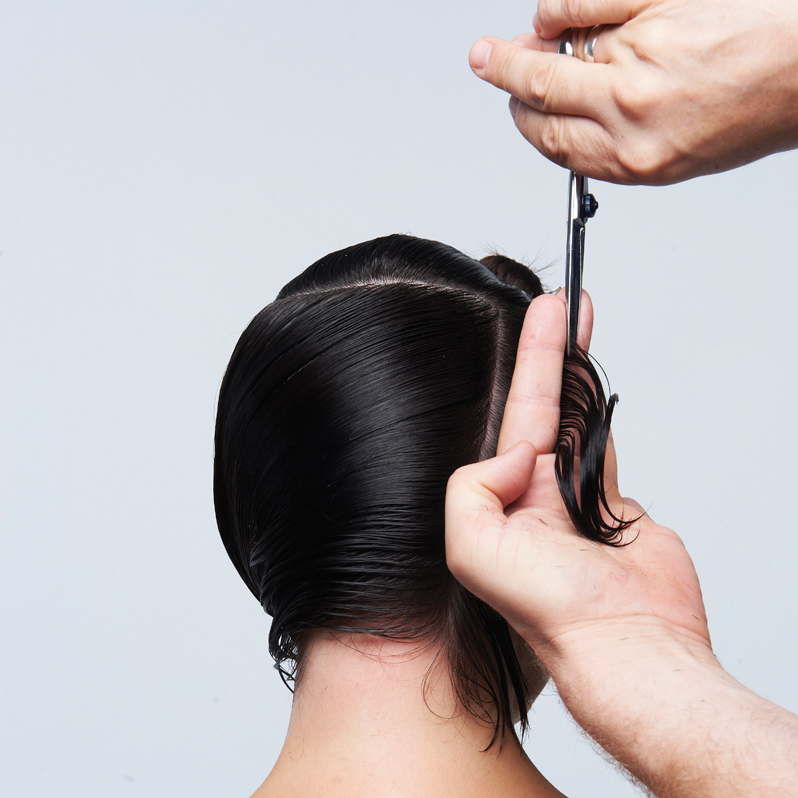
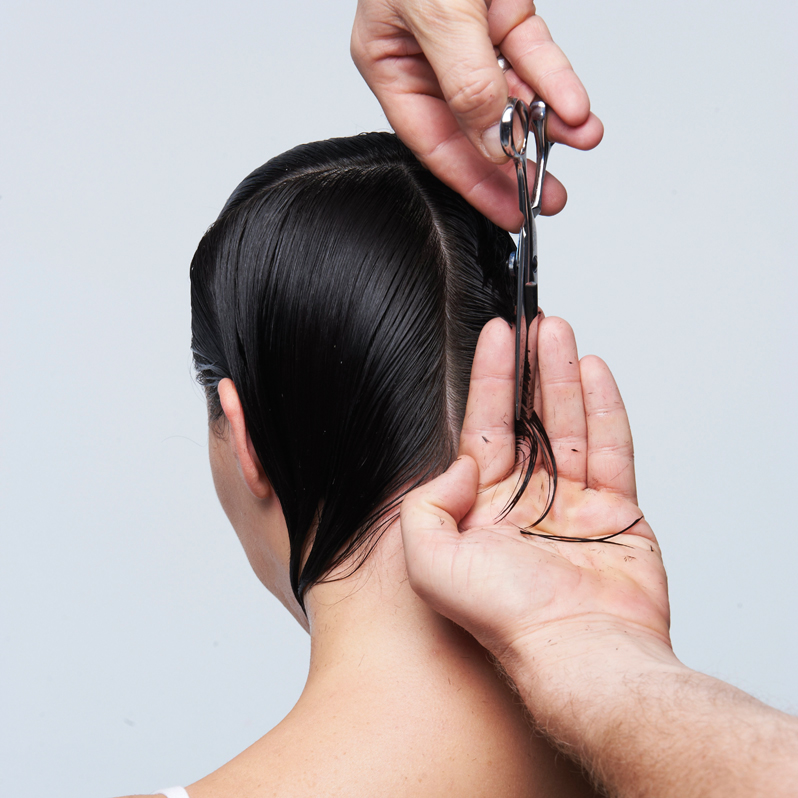
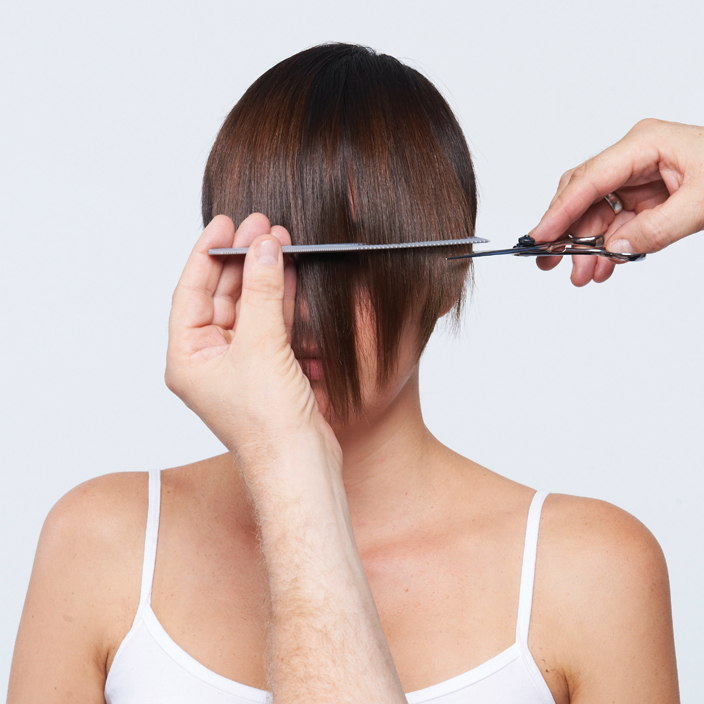
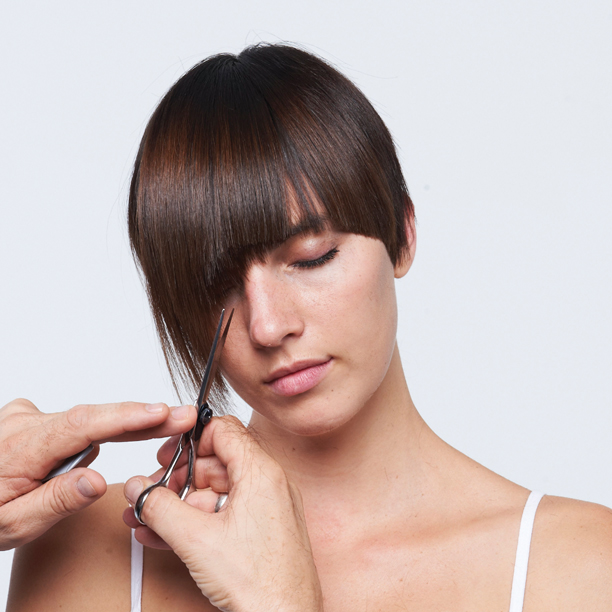
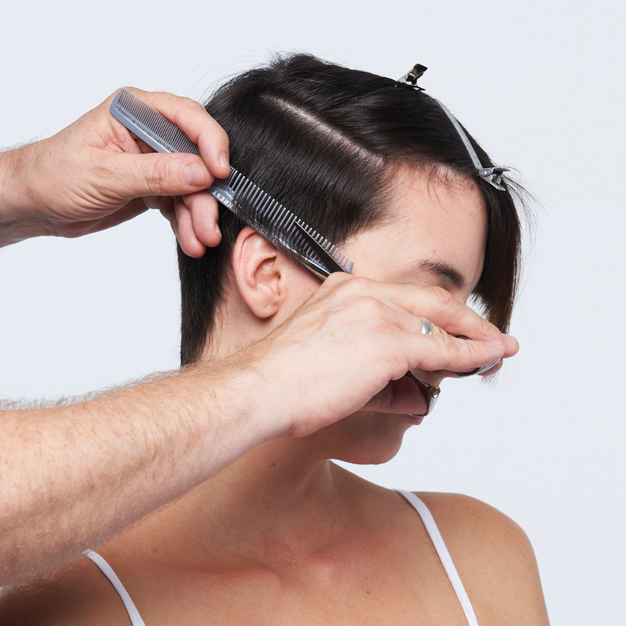
3Take a diagonal parting and cut to the desired length.
-
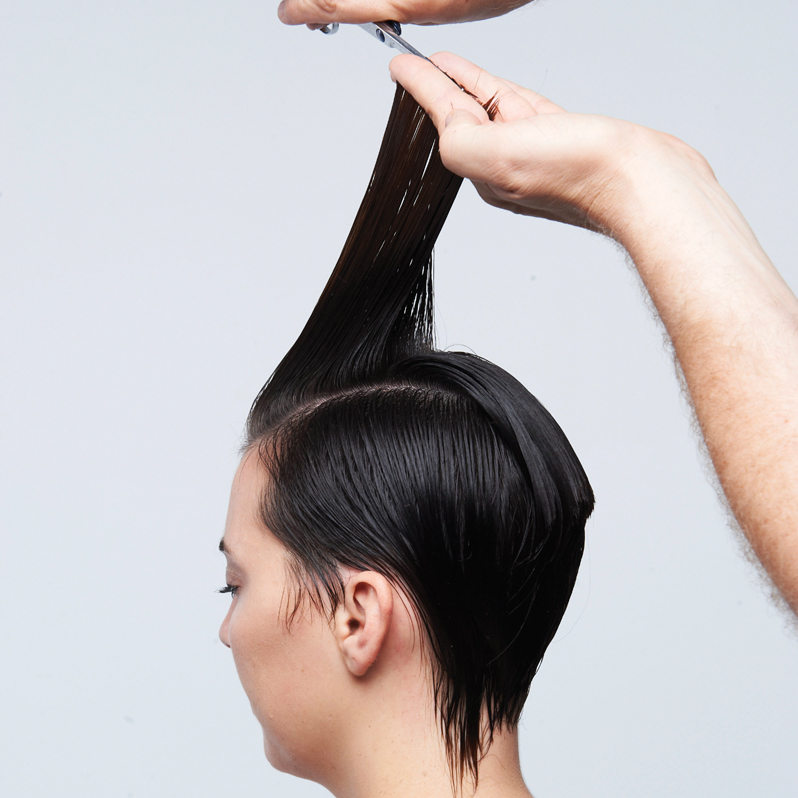
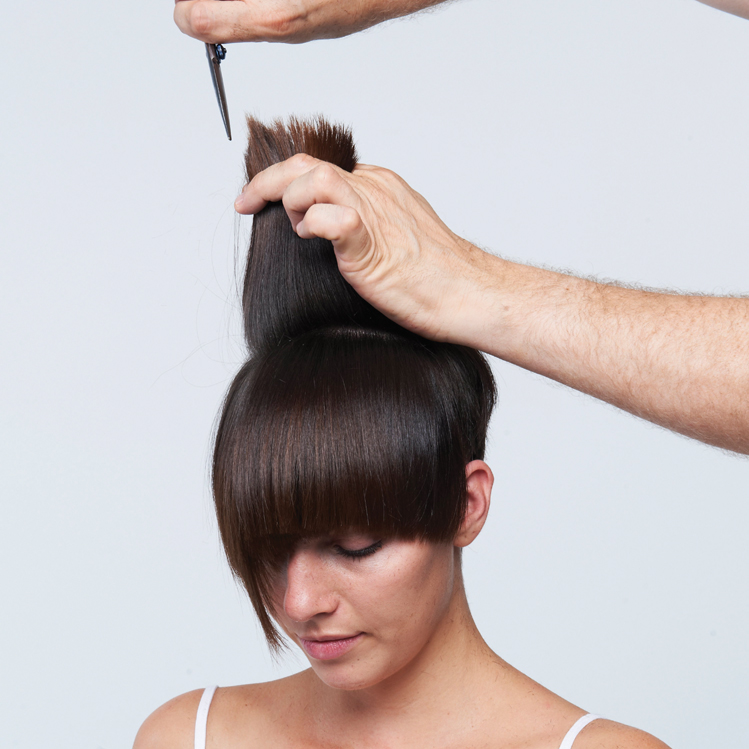
 4
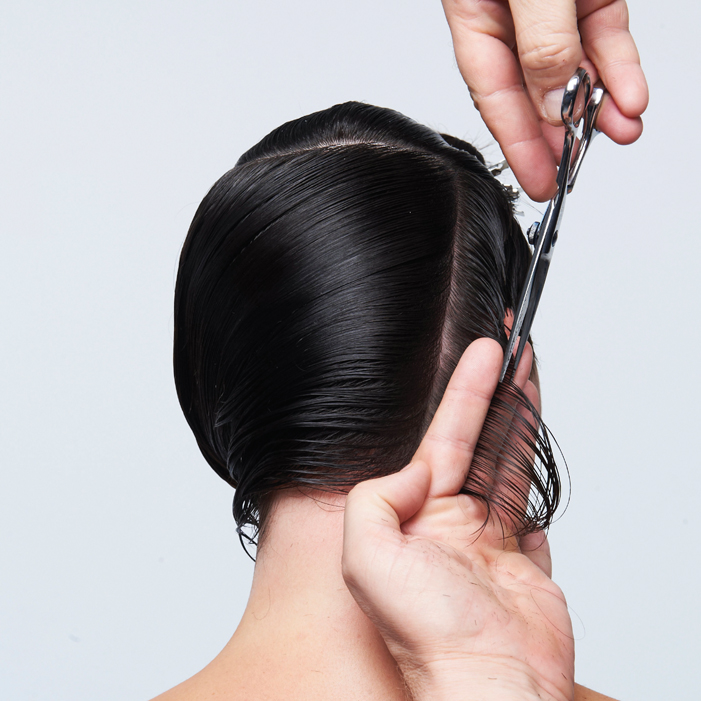
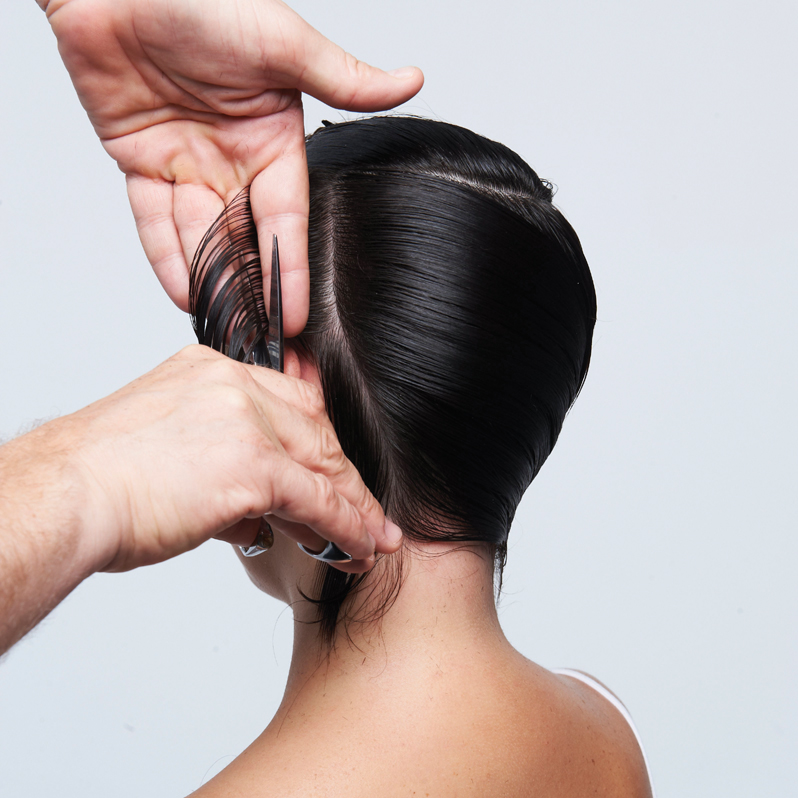
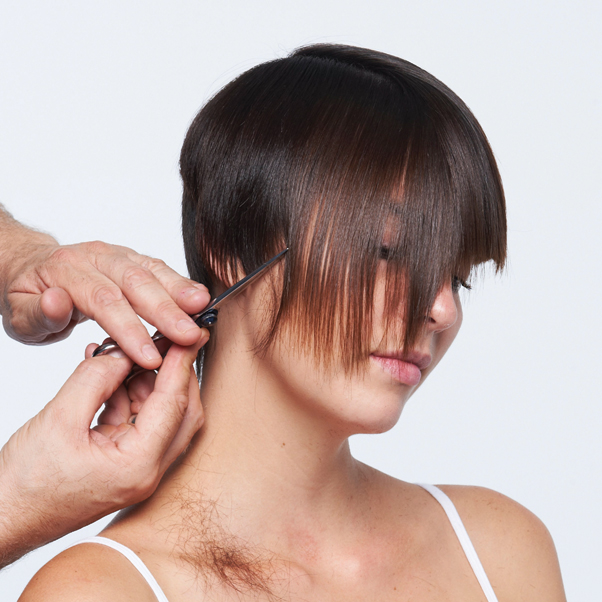
4Continue to work toward the back center of the head using the traveling guideline.
-
 5
5Continue to work toward the back center of the head using the traveling guideline.
-
 6
6Continue to work toward the back center of the head using the traveling guideline.
-
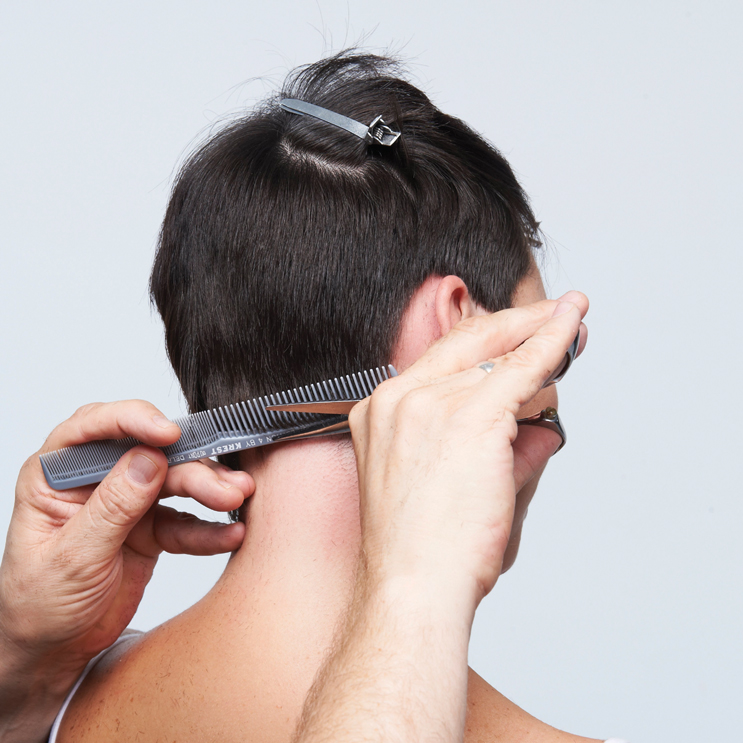
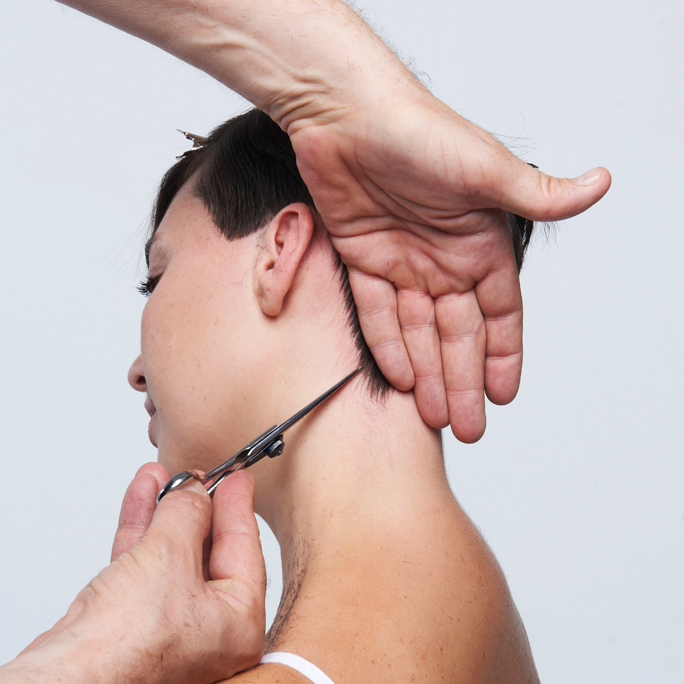
 7
7Continue to work toward the back center of the head using the traveling guideline.
-
 8
8Continue to work toward the back center of the head using the traveling guideline.
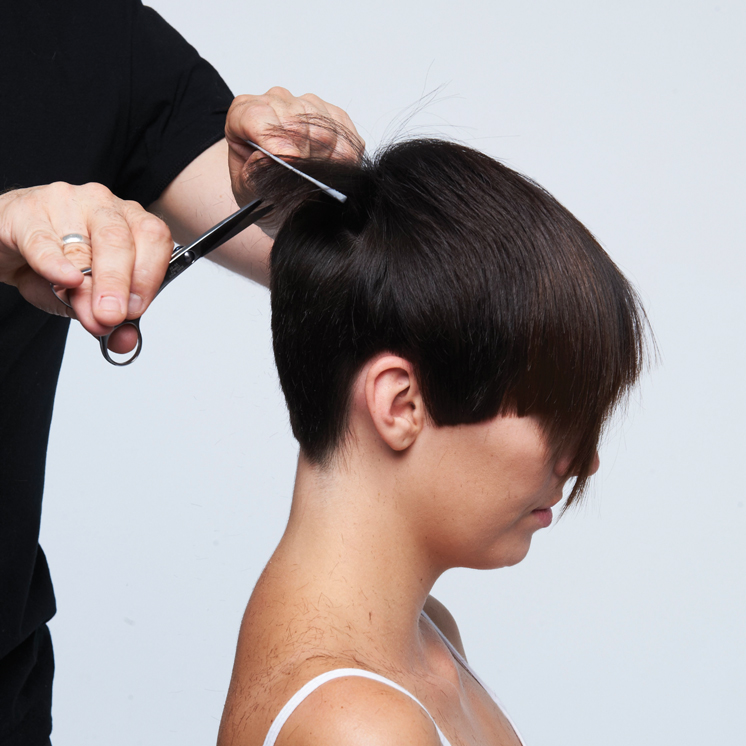
-
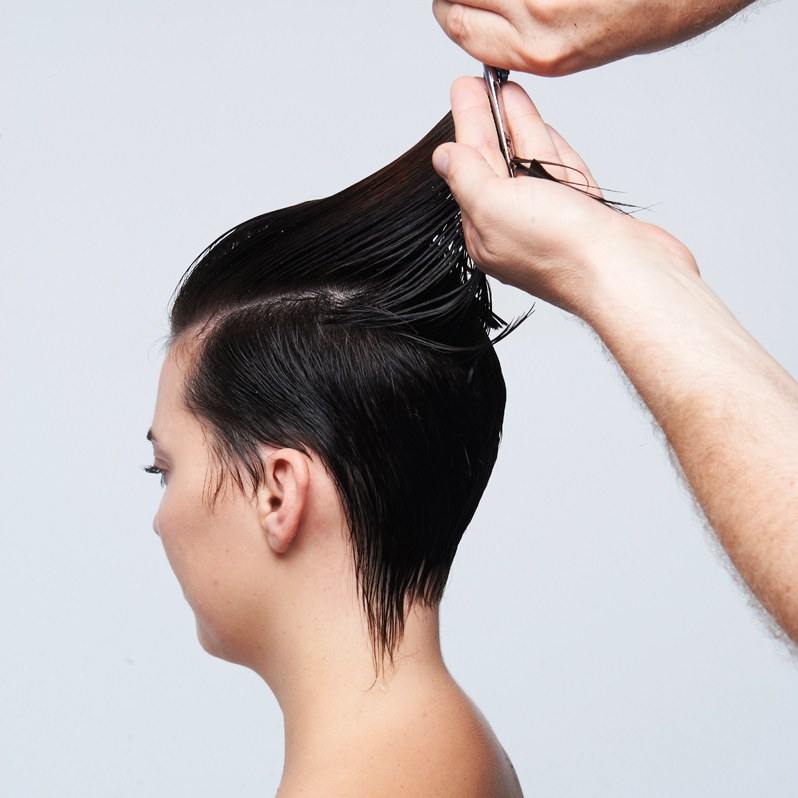
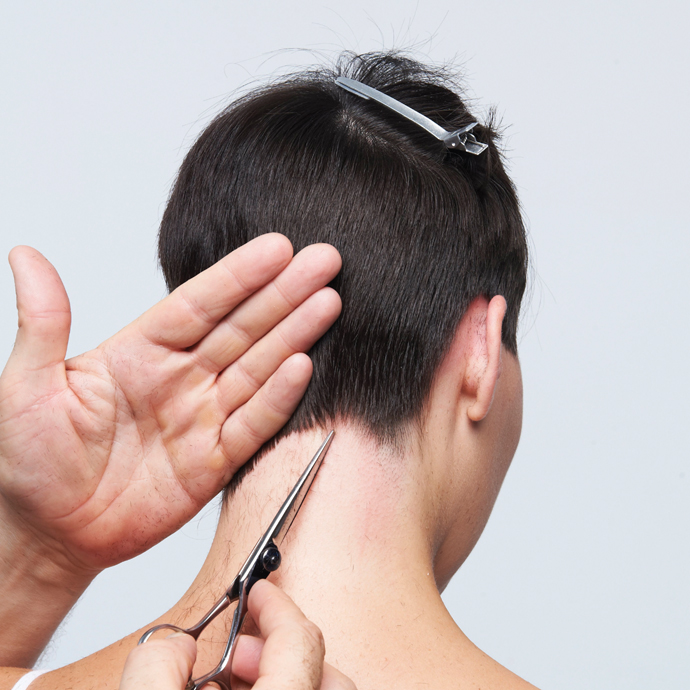
 9
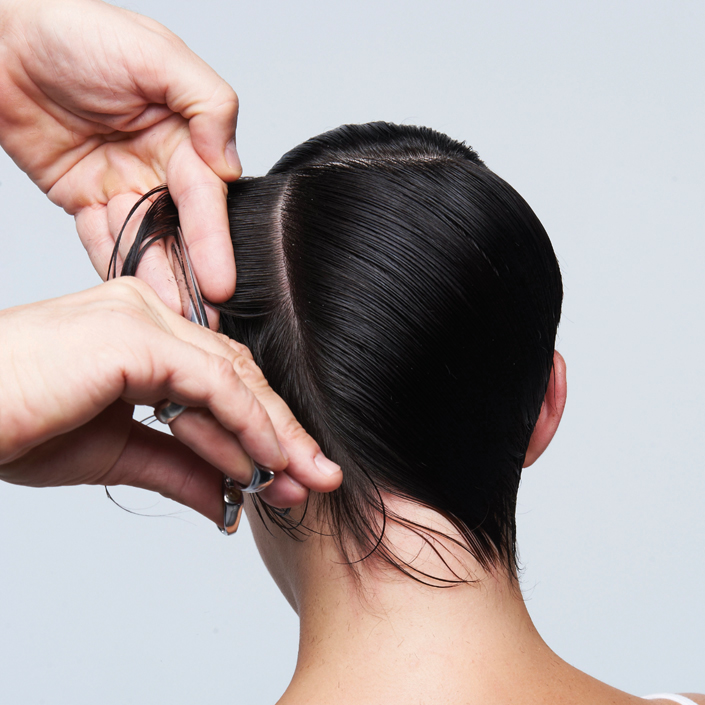
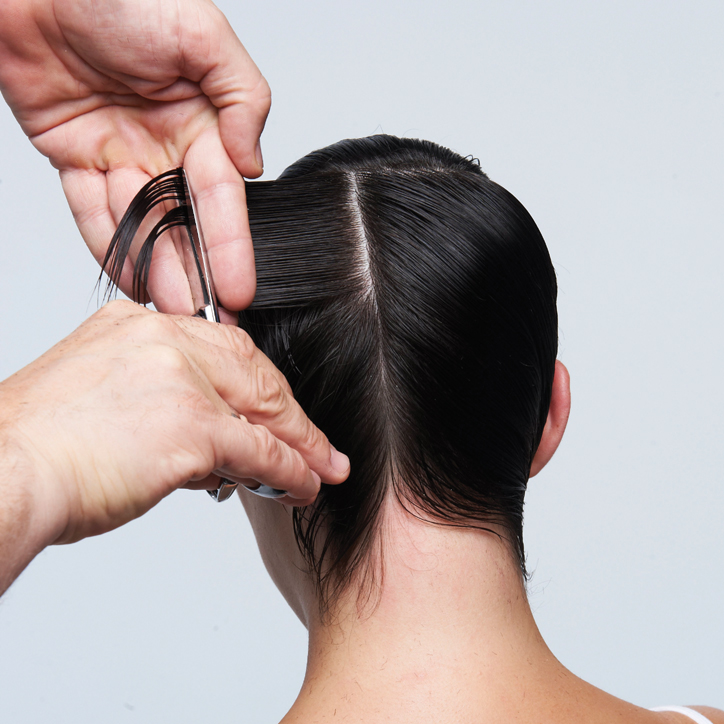
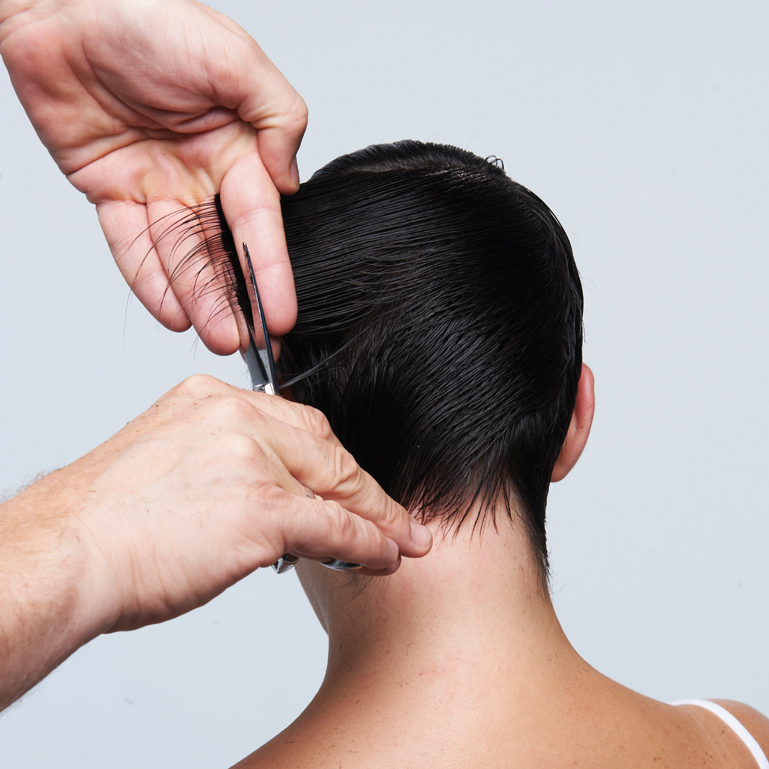
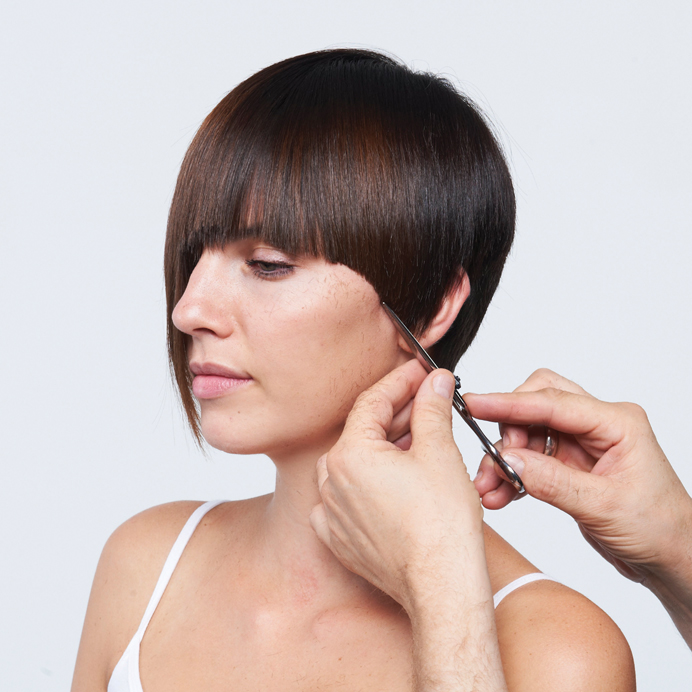
9Proceed to the opposite side of the head and repeat the process. Continue to elevate each parting to avoid excess weight and bulk. Note: In the areas behind the ear and around the nape, the partings are overdirected to create extra length, weight, and an asymmetrical back area.
-
 10
10Proceed to the opposite side of the head and repeat the process. Continue to elevate each parting to avoid excess weight and bulk. Note: In the areas behind the ear and around the nape, the partings are overdirected to create extra length, weight, and an asymmetrical back area.
-
 11
11Proceed to the opposite side of the head and repeat the process. Continue to elevate each parting to avoid excess weight and bulk. Note: In the areas behind the ear and around the nape, the partings are overdirected to create extra length, weight, and an asymmetrical back area.
-
 12
12Proceed to the opposite side of the head and repeat the process. Continue to elevate each parting to avoid excess weight and bulk. Note: In the areas behind the ear and around the nape, the partings are overdirected to create extra length, weight, and an asymmetrical back area.
-
 13
13Proceed to the opposite side of the head and repeat the process. Continue to elevate each parting to avoid excess weight and bulk. Note: In the areas behind the ear and around the nape, the partings are overdirected to create extra length, weight, and an asymmetrical back area.
-
 14
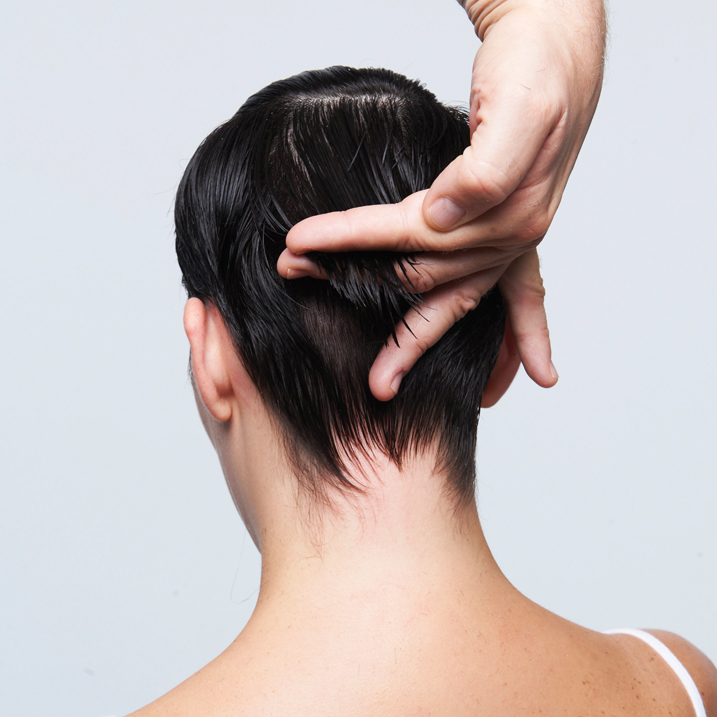
14View of the disconnected area.
-
 15
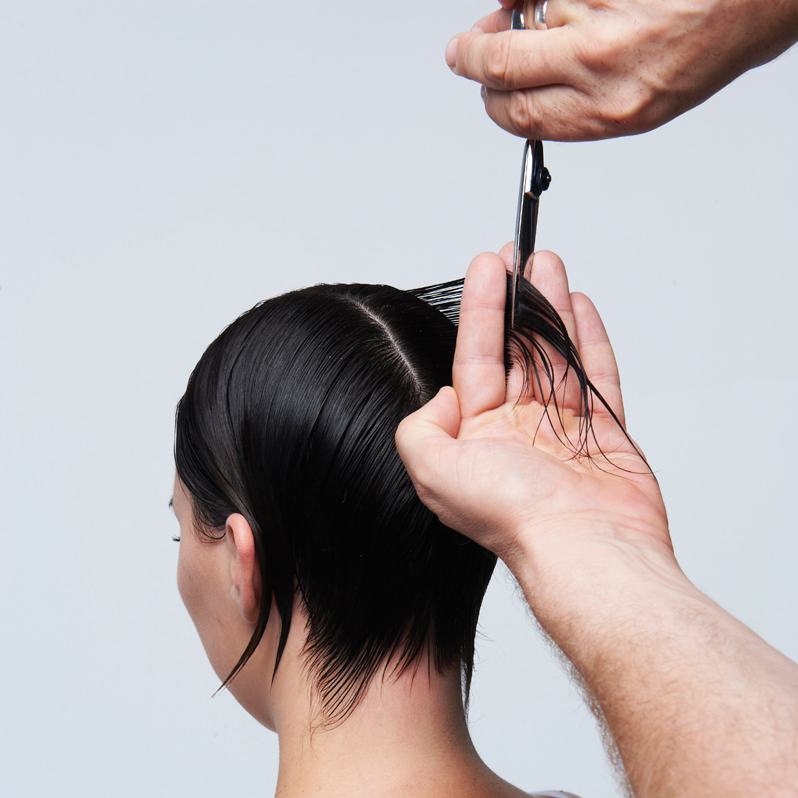
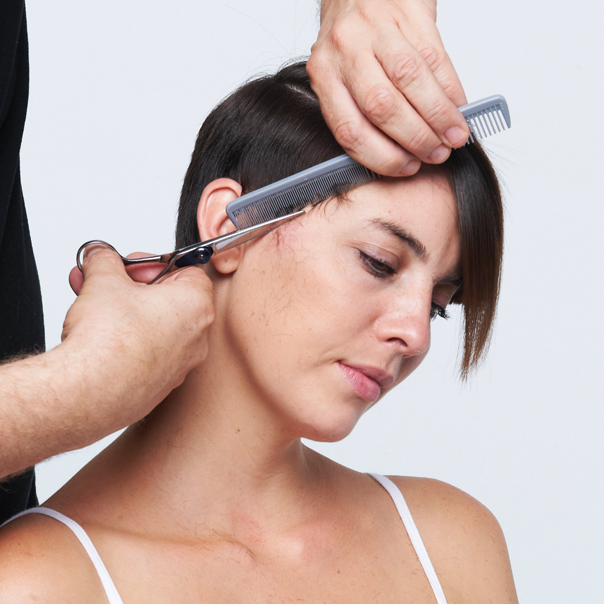
15Proceed to connect the crown area to the top front hairline: Take a vertical parting and cut a length that extends from the crown into the longer front fringe area.
-
 16
16Proceed to connect the crown area to the top front hairline: Take a vertical parting and cut a length that extends from the crown into the longer front fringe area.
-
 17
17Continue to pivot around the head by overdirecting to the first guide. Pay close attention to the crown growth pattern. Repeat the process on the opposite side (top area). Blow dry hair smooth using a Denman brush.
-
 18
18Continue to pivot around the head by overdirecting to the first guide. Pay close attention to the crown growth pattern. Repeat the process on the opposite side (top area). Blow dry hair smooth using a Denman brush.
-
 19
19Continue to pivot around the head by overdirecting to the first guide. Pay close attention to the crown growth pattern. Repeat the process on the opposite side (top area). Blow dry hair smooth using a Denman brush.
-
 20
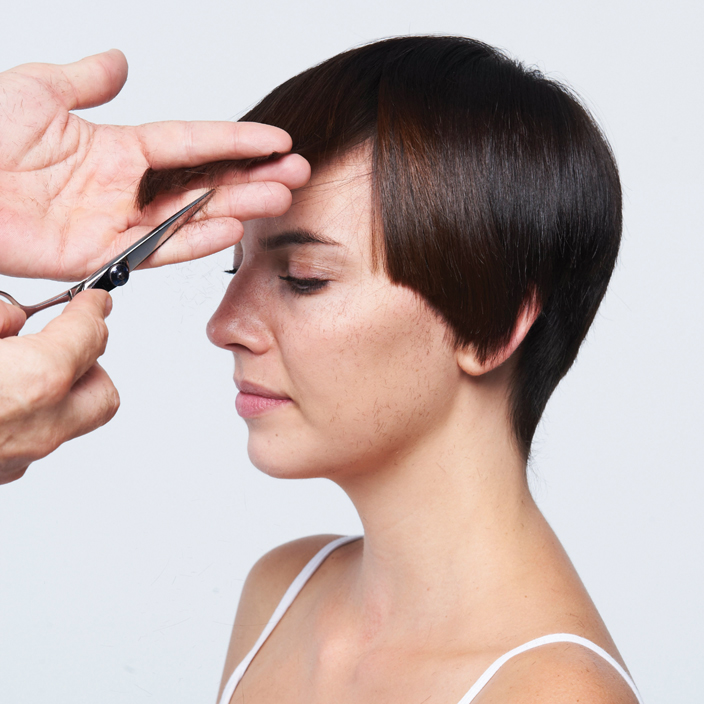
20Cut a heavy, curved fringe area. Elevate accordingly to create a beveled, curved line. Chip, elevate and lightly point cut into the external line.
-
 21
21Cut a heavy, curved fringe area. Elevate accordingly to create a beveled, curved line. Chip, elevate and lightly point cut into the external line.
-
 22
22Cut a heavy, curved fringe area. Elevate accordingly to create a beveled, curved line. Chip, elevate and lightly point cut into the external line.
-
 23
23Cut a heavy, curved fringe area. Elevate accordingly to create a beveled, curved line. Chip, elevate and lightly point cut into the external line.
-
 24
24Tilt the head slightly to further refine the outline.
-
 25
25Tilt the head slightly to further refine the outline.
-
 26
26Proceed to the opposite side. Continue the curved fringe/side area using the chipping and pointing technique.
-
 27
27Proceed to the opposite side. Continue the curved fringe/side area using the chipping and pointing technique.
-
 28
28Proceed to the opposite side. Continue the curved fringe/side area using the chipping and pointing technique.
-
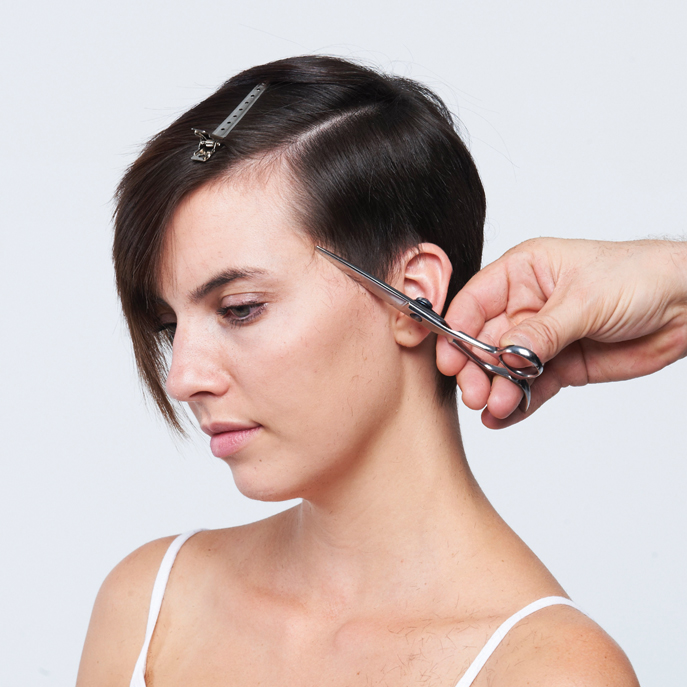
 29
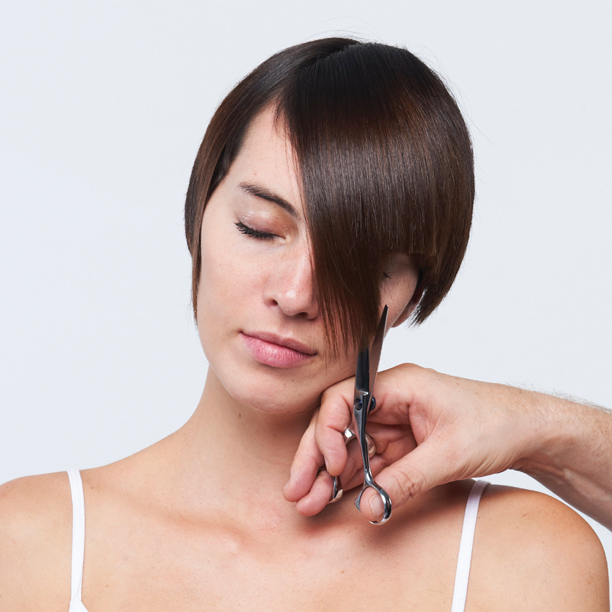
29Refine the side and nape areas on both sides by using the chipping and pointing technique. Always work with the hairline growth pattern. Determine a perimeter that creates an oval face shape.
-
 30
30Refine the side and nape areas on both sides by using the chipping and pointing technique. Always work with the hairline growth pattern. Determine a perimeter that creates an oval face shape.
-
 31
31Refine the side and nape areas on both sides by using the chipping and pointing technique. Always work with the hairline growth pattern. Determine a perimeter that creates an oval face shape.
-
 32
32Refine the side and nape areas on both sides by using the chipping and pointing technique. Always work with the hairline growth pattern. Determine a perimeter that creates an oval face shape.
-
 33
33Refine the side and nape areas on both sides by using the chipping and pointing technique. Always work with the hairline growth pattern. Determine a perimeter that creates an oval face shape.
-
 34
34Cross-check the internal lengths. Remove any corners by using the chipping and pointing technique. Chip into the crown area, working with the growth pattern. Re-evaluate the overall haircut after color placement and refine as necessary.
-
 35
35Cross-check the internal lengths. Remove any corners by using the chipping and pointing technique. Chip into the crown area, working with the growth pattern. Re-evaluate the overall haircut after color placement and refine as necessary.
-
 36
36who did it
haircut and styling: Damien Carney, Joico International Artistic Director
haircolor: Sue Pemberton, Joico International Vero K-PAK Color Artistic Director
photography: Hama Sanders
makeup: Walter Obal
wardrobe: Nikko Kefalas
website: www.joico.com
YOU MIGHT LIKE THIS
-
Curly
What a Curl Wants: How To Cut Curly Hair by Damien Carney
-
Bobs
Cropped Bob with Square Fringe by Damien Carney for Joico
-
Blowouts
Sleek and Straight Blowout from Damien Carney
-
Hair
Joico’s “Emily” Cut Technical
-
Hair
Long and Layered from Joico
TRENDING NOW!
-
BTC Hair Trend Report
The Biggest Haircut Trends of 2024
-
Monthly Product Launch List
11 New Game-Changing Hair Launches To Add To Your Arsenal
-
Copper
What Is The "Cowboy Copper" Hair Trend? Here's What It Really Means...
-
Frizz
Straighten & Smooth 2A, Fine-Medium Density Hair
-
Copper
Muted Bronze
-
Blonde
Conditioner Before Toner: Common Hair Myth Debunked
-
BTC Hair Trend Report
WWYD: How Hairstylists Are Navigating Inflation
-
Haircuts
SHAG 101: The Dos And Don'ts

