
TIGI S-factor Collection Step-by-Step

Advertisement
Advertisement
TIGI S-factor Collection Step-by-Step
HOW-TO STEPS 
-
 1
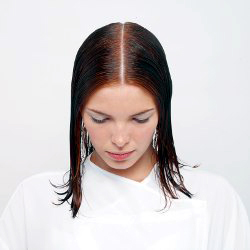
1After using S-factor Shampoo and Conditioner, apply Smoothing Lusterizer from roots to the ends thoroughly.
-
 2
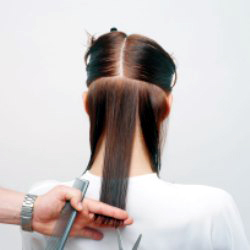
2Take a central profile parting from the forehead down to the nape.
-
 3
3Take two horizontal sections from the occipital to the top of the ears. Point cut the baseline rounded towards the sides, crosscheck for balance. Maintain horizontal sections and follow the guideline until all remaining hair that reaches the guide has been cut.
-
 4
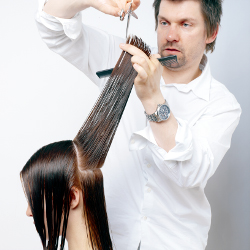
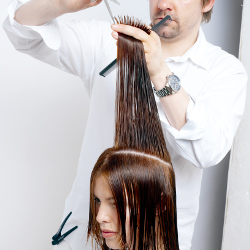
4Take a radial parting from the crown to the back of each ear to isolate the front from the back. Starting at the back, take a central profile section and layer to remove weight at the crown. Continue with pivoting sections, over direct each section to the middle.
Repeat the same layering technique on the opposite side. -
 5
5Take a profile section from the crown to the forehead, continue with point cutting using the guideline from the crown.
-
 6
6Continue working with diagonal back sections, over directing each to the middle following the layering guideline. Repeat the same technique on the opposite side.
-
 7
7Take a diagonal section, parallel to the hairline at the front, over direct forward and detail graduation.
Repeat on the opposite side to create a balance. Continue with diagonal sections, over direct forward and cut to complete the graduation line. -
 8
8Reapply Smoothing Lusterizer to the ends of the hair.
Blow dry with a large round brush. -
 9
9For ultimate sleekness use the Hardcore Professional Flat Iron on the ends.
Finish look with Dream Drops. -
 10
10Credits
Cut by: Akos Bodi, European Education Director
Photography: Anthony Mascolo & Roberto Aguliar
Styling: Jiv
Make-up: Pat Mascolo -

YOU MIGHT LIKE THIS
-
Hair
How To Get The Look by TIGI
-
Hair Color
Technique: TIGI Ricochet Collection
-
Hair
TIGI Overcut: Ricochet Collection
-
Hair Color
TIGI Colour Collection Technicals
-
Hair
TIGI Urban Detailing Cut Step-by-Step
TRENDING NOW!
-
BTC Hair Trend Report
The Biggest Haircut Trends of 2024
-
Blowouts
Bombshell Blowouts: 4 Ways To Create Lift With Longevity
-
Copper
What Is The "Cowboy Copper" Hair Trend? Here's What It Really Means...
-
Curly
Long Layers: 10 Pro Tips + Common Cutting Mistakes
-
Ask A BTC Expert
5 Foil Tips & Tricks From @the.blonde.chronicles
-
Hair Extensions
Clients With Hair Loss? Read This To Get Their Pre-Thinning Density Back
-
Haircuts
SHAG 101: The Dos And Don'ts
-
Frizz
Straighten & Smooth 2A, Fine-Medium Density Hair

